Showing posts with label made in USA. Show all posts

Wednesday, July 31, 2013

"Lilac Roller III"

This is my final and last entry in the Colored Pencil Magazine July 2013 Art Challenge.  I had shared a copy of my previous drawing with my Mom and she thought it would look better with the foliage included, as in the challenge photo ...

I thought about it and tended to agree ... so here is my third and final entry into this month's Art Challenge.   This one has been completed on Strathmore Toned Tan Sketch Paper with a watercolor pencil (wet application) under painting followed by dry colored pencils for shading and details.

Hope you like it!
"Lilac Roller III"


this is the reference photo...


Take care ... wishing you a happy and loving day,
Karen Anne Brady aka Ireland Brady

Sunday, March 10, 2013

"Easter Egg Bunny #3" a New Zentangle Inspired piece of art!

I am loving my "Orbital Easel" more each time I use it ... it is truly the dream easel of all easels! Another plus, because of sitting in a more comfortable drawing position, I find that I now have more stamina and am able to continue working longer with no distracting aches and pains.  Thank you Orbital Easel!  It is also much easier to get things in perspective, eliminates a lot of erasing.

I really had a lot of fun creating my latest ACEO ... he just makes me smile!

"Easter Egg Bunny #3"

If you would like a chance to purchase the original, it is now up for auction at eBay:

Authorized Open Editions ACEO Art Prints are available to you through Etsy at:

Hope you are all have a "Hoppy" day!
Karen Anne aka Ireland Brady

Friday, March 8, 2013

My new "Orbital Easel" & "Easter Egg Bunny #2"

I have been checking out the "Orbital Easel" for the past two weeks and finally on Tuesday I decided to go ahead and order one for myself, the 19" x 25" easel with the table top base.  Imagine my delight when it arrived on Thursday!  So of course I had to immediately unpack it, rearrange my art area and start in on a new ACEO!

My reaction to my first use of the "Orbital Easel"? .... TOTALLY AWESOME!

And here is my initial review ... I am taking to this new easel like a duck to water! It provides a new freedom and flexibility when using watercolors, colored pencils, and ink pens. It is truly a modern miracle for today's artists! I got so lost in the piece I was working on that I didn't even realize how much I was moving it ... just feels so absolutely natural.

My arms love it! My eyes love it! It provides the perfect angles! Makes application of watercolors easy, colored pencils just love it, ink pens are captivated by it!  No more constant turning of the piece I am working on to achieve the right angle, I don't have to worry about a glass of water tipping over and ruining a piece (cuz I can't very well place a glass on an angled surface), this easel is definitely going on vacation with me this year!  The table top base works quite well for me, it is sturdy and with grip pads on the bottom it stays in place and does not move.  They also have a clamp base that I understand can be used on a heavy duty tripod as well.  The working area of the easel is laminated with light weight aluminum on both sides and is quite rigid so that if you happen to lean on your work, like I do, it does not flex or bend.

The only body part that rebelled a bit was the back ... it was so used to hunching over a flat work area that it is having a bit of a time adjusting to working in a natural upright position! LOL! I am totally IN LOVE with the "Orbital Easel"!   I would actually go so far as to call it an artists' third hand!

I started the new ACEO yesterday and was so excited to get back to my "Orbital Easel" that first thing in the morning I was back to having fun!  I like it more today than I did yesterday!  And today my back didn't rebel ... guess it only needed one night of good sleep to accept a better drawing position ... 8)

I just finished working on "Easter Egg Bunny #2", I think I worked on him longer than I expected because I didn't want to leave "Orby" (yes, I name inanimate objects that I fall in love with) but I had to get him (Easter Egg Bunny #2) scanned and posted on eBay and Etsy.  

Without further ado, here is my new ACEO and the first piece to be completed with Orby's assistance!

"Easter Egg Bunny #2"

He has just popped out of his shell and seems to be quite delighted to see the new world around him!  It is filled with beautiful bright colors and wonderful smells but he seems to be looking up with loving eyes at someone very, very special.   Could that very special someone be you?

The original of "Easter Egg Bunny #2" is now listed on eBay at:

And Open Edition ACEO Art Prints can be found at Etsy:

Hope you are all having a grand a day as I am!

Karen Anne aka Ireland Brady


Thursday, March 7, 2013

"Easter Egg Bunny"

OK ... as you can tell ... I'm not avidly "gleaning" as I said I would!  Keep walking past my art area and  those darn colored pencils, marker pens, and water colors just keep enticing me over ... then I sit down to just straighten things up, next thing I know I have a pencil in hand and a few hours have just slipped away!  Figure mole hill gleaning will work just fine!

Here is a new little ACEO I just finished this morning ... thought an Easter theme to be appropriate for this time of year so here is ....

"Easter Egg Bunny"

He has just popped out of his shell and doesn't know quite what to make of the world around him!  It is filled with beautiful bright colors and wonderful smells but he is so very used to the safety and security of his little shell.  I'm sure he will be enticed to venture out and explore before too long!

You can find the original ACEO at eBay:

And Open Edition ACEO Art Prints at Etsy:

Hope you are all having a GREAT day!
Karen Anne aka Ireland Brady

Saturday, July 21, 2012

"Dancing Dragonflies"

"Dancing Dragonflies" is my latest illustration.  This drawing was inspired by a couple who are getting married in October, their theme is dragonflies and their colors are deep violet and cranberry red.  For some reason I kept seeing two dragonflies in my mind and just had to get the design down on paper ... and the color combination of violet and red was a great plus!

The dragonflies took about two days to complete, during which time I kept mulling over in my mind what should I do with the background?  Leaves kept popping up ... so, once I had completed the two dragonflies I made a copy and began experimenting ...since leaves predominated my mind, I started there, grabbed a green art pen and started randomly putting them down on paper.  I liked the effect it was having and grabbed the original and spent the next two days drawing green leaves!

I think this drawing really turned out quite nice and am happy to share it with you today, so... here is

This illustration is now available in my Etsy Shop as an authorized art print (your choice of print size up to 8.5" x 11") and as an open edition ACEO (size 2.5" x 3.5").
I was really surprised when I made my first print of the original ... the print actually looked better than the original!  That's a first and quite a nice surprise!

Happy Day All!
Karen Anne

Thursday, July 5, 2012

Building up to "Celebrate Oz" Blog Party!

As a build up to the "Celebrate Oz" blog party over at Oma Linda's blog, "Olde Baggs 'n Stuffed Shirts" , I have begun listing the 18 Oz ACEO's in my Etsy Shop.  I am listing one a day until the 19th of July (Partay Day!) and thought I'd share them here as well.

I have a bunch of giveaways planned for the fun celebration day  ....  one lucky person will win an Oz ACEO original of their choice!  Be sure to come back on July 19th for details on how to enter!

OK ... so, here are the first five Oz ACEO's that I have currently listed in my shop ....

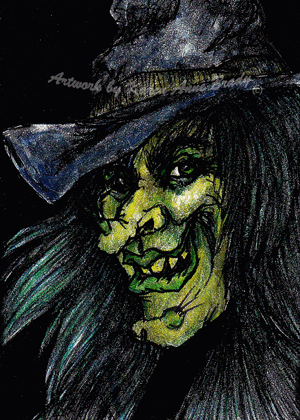
"Hello My Pretty!"

"Dorothy and Toto"

"The Wicked Witch Is Dead!"

"Munchkins"

"Glinda"

I'm really looking forward to Oma Linda's Celebrate Oz 2012 Party and hope you will join in on the fun too!  If you would like to personally participate add your link to Oma Linda's Participants Linky List!

Happy Day!
Karen Anne

Sunday, June 17, 2012

Blue Dragon Sea Slug aka Glaucus Atlanticus

The other day I was searching for an unusual subject as the basis of my next illustration.  While I was looking through various images on the internet I came across this extremely strange looking species ... "Glaucus Atlanticus" aka Blue Dragon Sea Slug.  Wanting to complete a drawing that is relatively simple, I decided this litter creature just fit the bill.

A little background on this weird yet exotic critter:   It is called a Glaucus Atlanticus (aka the blue dragon sea slug) and they are often found in temperate and tropical waters. It floats on the surface of the water with the aid of a gas filled sac in its stomach. Because of the location of the sac, this little slug floats upside down. They feed primarily on the  venomous Portuguese Man O' War jelly fish.  They survive by collecting the animal’s toxins and storing them in little sacs on the ends of their feather-like “fingers”, producing a much more powerful and deadly sting.

Beautiful to behold, but I don't think I'd want to come into contact with one!  Prints will be made available in my Etsy Shop.

Happy Day!
Karen Anne

Saturday, April 28, 2012

Question ....

I am beginning work on a new illustration and I was wondering if I have done too many works in progress (WIP) on my blog?  Would you like me to post daily pictures of this piece, or wait until I have finished it, made it into a slideshow video and then post that?

Your comments will help me determine which way to go ....

In the meantime, here is the sketch I worked up on tracing paper ... this is a beach scene.  I want to work mostly on back ground in this illustration and this sketch is loaded with beach treasures and driftwood and lots of sand!

These are the two photos I am working from,  I like the way the little girl is positioned in the first one and the driftwood in the second photo has a lot of character.....

t


Here is the sketch I created using these two photos and then adding more "stuff" to the overall drawing ...
Thanks for your input on whether you prefer daily postings or a slide show video when this project is completed!

Happy Day!
Karen Anne Brady

Friday, March 23, 2012

"Bowl Of Cherries" Day Three

Today I completed the woodwork on the deck rail.  For the wood I burnished the layered colors with a burnishing pencil and then used a black raspberry Prisma Premier colored pencil to add details and some additional shadowing.  I also completed the tablecloth on top of the table, after applying several layers of oranges and reds I burnished the layers with a burnishing pencil and then I used the tip of an Xacto knife blade to scratch a scored design.  Once again, I sprayed the finished work with workable fixative (meaning I can color over the fixative once it has dried to make any wanted changes).


With the completion of the woodwork I decided my next move would be to work on the lad's shirt, so I used the knife blade to cut away the masking paper leaving the shirt exposed and ready for coloring.  I felt a plain shirt was just .... well, too plain ... and I added a little celtic design to add some character.  Kids love to wear clothing with some fun design.   

First I colored in the design and then added a layer of light blue to the shirt, I burnished the blue using a white colored Prisma Premier pencil.  Slowly I added more layers of deeper blues, burnishing each of those layers (lightly) with a burnishing pencil, after which I applied a light coat of workable fixative.   The following is the result of all of today's efforts .....


I'm not sure where I will go tomorrow ... the boy or the bowl of cherries ... hmmm, something to ponder while I study the piece tonight.

Remember, if you want detailed instructions for using these techniques, refer to "Colored Pencil Painting Bible" (Techniques for Achieving Luminous Color and Unltrarealistic Effects) by Alyona Nickelsen at BrushAndPencil.com

Happy Day!
Karen Anne Brady

Thursday, March 22, 2012

"Bowl Of Cherries" - Day Two

So far today I have completed (for now) the shrubbery in back of the deck rail.  I applied several layers of different green colored pencils, indigo blue and black, and some dark brown in a camouflage type pattern; after which I applied mineral spirits with a Q-tip in a dabbing manner.  Once this was finished I added more black to add contrast and a bit more brown to the green, but I was lacking highlights I wanted so I took an exacto knife with a sharp blade and scratched little bits off of the top of the green areas and this provided some dimension to the background without its overpowering the composition of the illustration.

After which I applied a coat of workable fixative so that I would not smear the background area as I begin work on the deck rail.  I also lightly traced around the figure of the boy and the bowl of cherries with the same knife blade and removed the masking paper just from the rail area, leaving the boy protected from smudging as I begin coloring the woodwork.

"Bowl Of Cherries" Background completed


Well, I have now started working on the top of the deck rail and have the slats in the rail blocked in.  With the rail, I am using a burnishing pencil to blend the layers of color, then I used a sharpened pencil to add in detail of the wood grain.  But, I have been working on this so intently that I am too tired to do any more coloring ... so I am calling it quits for the day before I begin making all kinds of mistakes.    The following is the rest of today's progress.


Til tomorrow ... Happy Day!
Karen Anne

PS  These are techniques I am learning and applying from reading and studying the book "Colored Pencil Painting Bible" (Techniques for Achieving Luminous Color and Ultrarealistic Effects) by Alyona Nickelsen.
If you want to learn more about these techniques in depth, I highly encourage you to purchase this book, it is truly amazing!

Friday, March 16, 2012

Little Girl - Drawing In Progress - Day 3

Today I mostly worked on her outfit, but I did add some contrast to the skin tones and hair.  I was able to achieve the black in the dress by first laying a base of deep blue over which I colored black; then I took a small paint brush, dipped it in mineral spirits and dabbed it onto the black of the bodice, this evened out the pencil strokes.

Then, using a flat wide brush, I gently stroked the mineral spirits onto the black of the skirt which left it looking a bit like velvet, which is what I had been hoping for.  I can now see that I must have mixed up my colors when doing the plaid because some areas look pinker than other parts.  Oh well!

Finally I began working on the grain of the woodwork on the mission style couch.  Looks like there is a good chance I will finish it up tomorrow!


If you would like to learn more about these techniques, refer to "Colored Pencil Painting Bible" (Techniques for Achieving Luminous Color and Ultrarealistic Effects) by Alyona Nickelsen.   This is a highly informative book and one of the best investments I have ever made!

Happy Day!
Karen Anne

Tuesday, February 21, 2012

Monday, February 20, 2012

Day 72

Well, since we already have a Raggedy Ann it would seem appropriate that we include a Raggedy Andy!  Now, in our household .... no one wanted Raggedy Andy in his traditional garb ... my boys want Andy in a football outfit!  So, with some slight pattern adjustments ...  here is Andy in his football togs!


The Number Three

Zentangle Number Three is now available in my Etsy Shop as an authorized art print (8" x 10") and in ACEO format (2.5" x 3.5") .....


Saturday, February 18, 2012

A New Zentangle Inspired Series!

As an accompaniment to my Zentangle Inspired Alphabet Series, I recently completed the Zentangle Numeral/Number Series.  The number series is being made available as an Authorized Art Print (8" x 10") and in ACEO format (2.5" x 3.5").  They will also be available as coloring pages, you need to specify if you want a color page so that your print will be made on a laser printer.  Many people have received enjoyment from adding color to the black & white letters thereby making them personal.

Each day I will be listing a new number in my Etsy Shop, as well as posting them in this blog.  For today, I am pleased to present you with ....


Friday, February 17, 2012

Day 69

Today was one of those days when I just couldn't settle on what to sketch, so I decided to try my hand at one of those drawings where you put the pen to the paper and don't lift it up again until you are finished ... a one line scribble drawing?   I don't know what it's called but here is my rendition ....

Not one of my better efforts, but at least I sketched something today!  

Thursday, February 16, 2012

Day 68

I guess I was in a silly mood today when I drew this sketch ... I was remembering when the kids were little and I would let them have a bubble bath and they would sink down below the bubbles and pop up!  I guess a good title for this sketch could be ....

"Bubble Wrapped"